06/10/2010

Cut bunny baby....

I promised to show you these cards yesterday, but I forgot and showed you Tara's instead. So I'm giving you a cheery start to your day with these little bundles of uber-cuteness! I decided to cut the bunny bodies from gingham/polka dot papers so that they look like little dress-up outfits and added the details with pink Bazill. I punched some tiny circles with the largest hole punch on my Cropodile and added teeny holes to them to look like buttons then adhered them to the front of the bunny bodies (double click on the pictures to see them in more detail)
The completed bunnies were adhered with foam pads to a punched border on an Easy Easel. 'Cute' was cut from glittercard and adhered to another punched border creating the 'stop' A layered bloom and a smattering of pearls complete the card.
Cart used:
Bunny Baby & 'Cute'- Simply Charmed
Thanks for dropping by!
Heather xxx

05/10/2010

A Shutter card for Tara......


Our niece Tara has a birthday today. I was caught on the hop with this one..she lives in Melbourne, Australia where she is at medical school, and I only posted this yesterday! Hopefully she'll get it by the weekend.
I used a shutter base for this card..these are so easy to make but are time intensive but they are worth the effort. There are 3 large panels to decorate but I leave the centre one blank to write the greeting on. I used a piece of A4 cardstock and using a Hougie board, scored 5 & 10 cms on each short edge then 4cms in on each long edge-this gives you 3 large panels, 2 long narrow panels and 8 small square panels. Then you cut along the 2 long score lines between the two 5 cm score lines on the short sides (phew I hope that makes sense!) If you want 3 large square panels score the 2 long lines at 5cms instead of 4.
All you do then is decorate the panels. You can apply paper directly to the panels or mat them. It is easier to decorate the card before you fold it. You must make sure that the matted panels are slightly smaller than the actual panels or folding will be difficult.
I added a scalloped rectangle topped with a birthday word embossed panel to the front of the card. I cut a model, dressed it , then adhered it to the panel. I added a large Prima rose and some pink pearls. 'Tara' was cut from pink glitter card and adhered to the top centre long panel, whilst ribbon and a bow was adhered to the other long panel. A simple mat with 'Happy Birthday' and a couple of flourishes complete the card.
Have a go at one of these cards, you'll not regret it!
Carts used:
Scalloped panel- Just Because Cards
Model- Forever Young
Happy Birthday- Stamping Solutions
Flourishes- Winter Frolic
Tara- Winter Woodland
Thanks for dropping by!
Heather xxx

04/10/2010

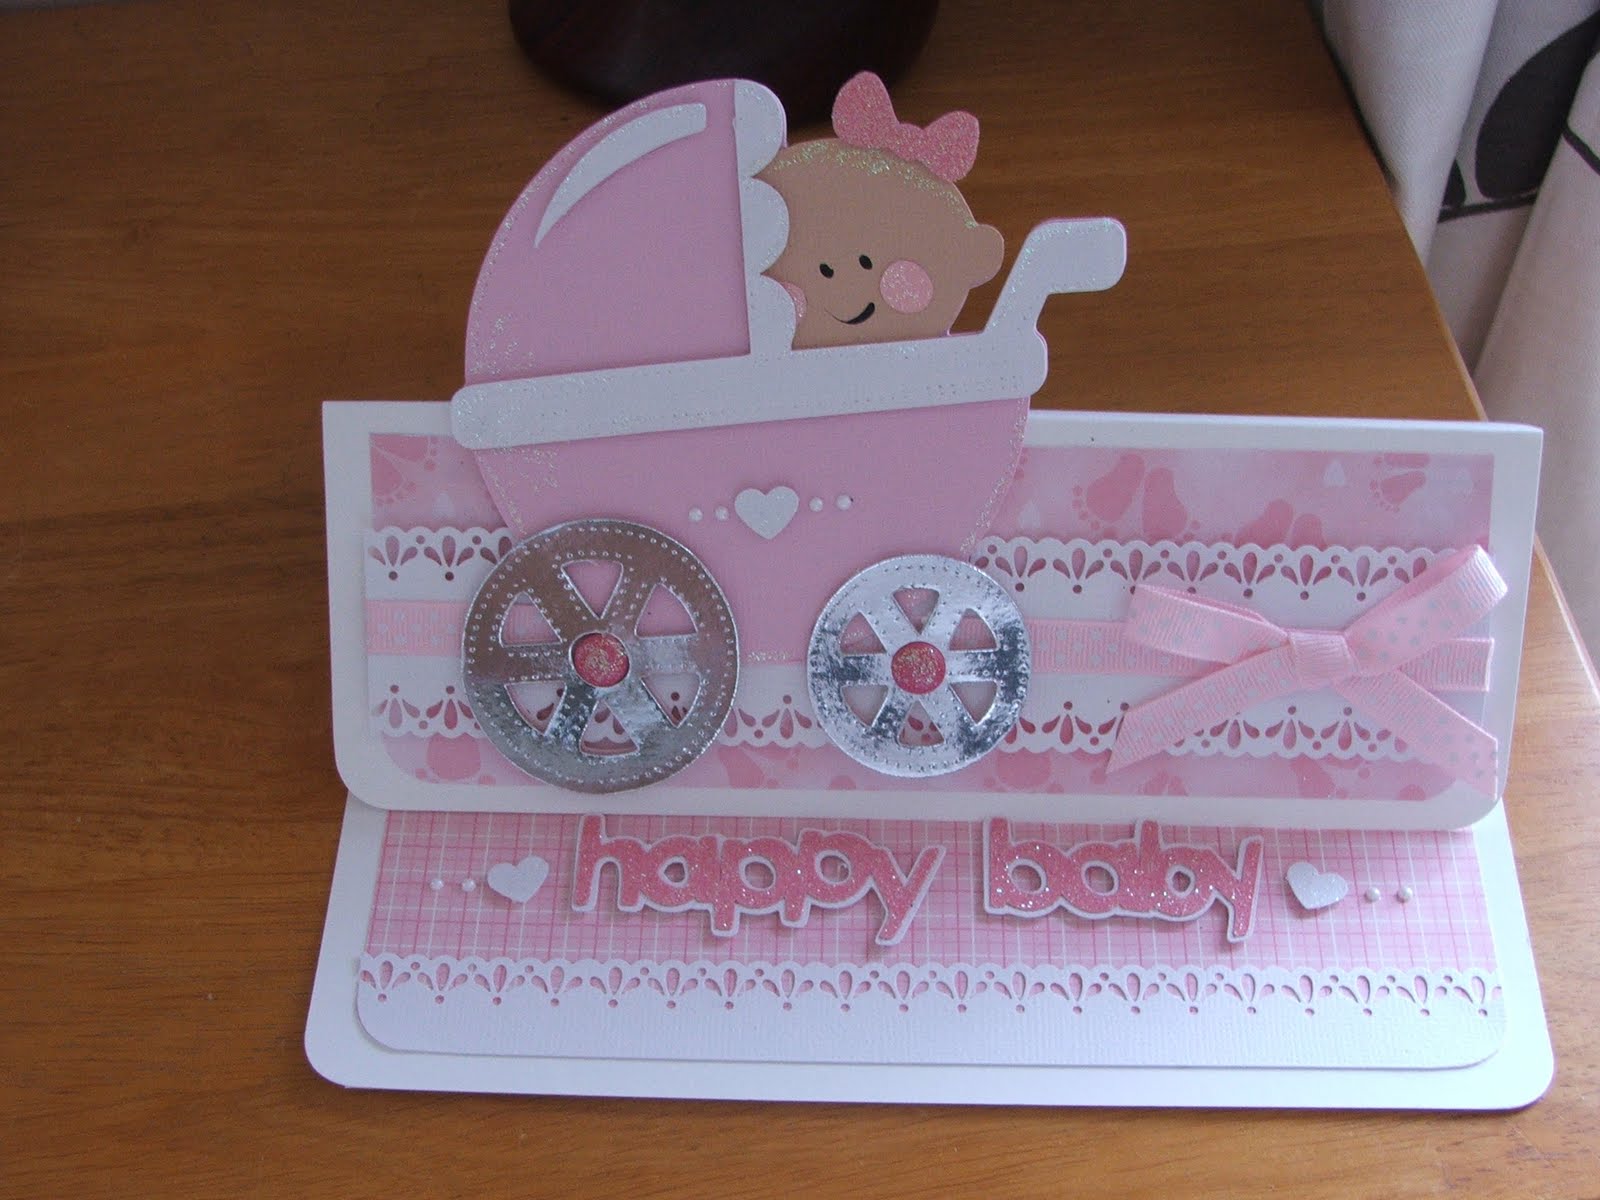
Happy Baby....

AAWWW! Isn't this THE cutest cut?! Just look at the smile on that little one's face! Melts your heart don't it?! This cut is from my most recent aquisition..Simply Charmed. This cart is CRAMMED with cute cuts, all with little smiley faces on them. However because each cut has up to 4 layers you can omit the faces just by reducing the amount of layers to 3..so this cart is VERY versatile! As you can see I made 2 versions..a boy & a girl. An Easy Easel forms the base card along with pretty paper, a punched X-Cut border and ribbon (What!..NO FLOWERS?!)

I added detail to the prams with a dressmaker's wheel, along with Candy Dots for the wheel hubs and a punched glittery heart and some white pearls. 'Happy Baby' was cut from glittercard with a white shadow and adhered to the base card with foam pads to form the 'stop'. A couple of punched hearts and a smattering of pearls complete the cards.
Carts used:
Pram & 'Happy Baby'- Simply Charmed
If you think this cute wait until you see tomorrow's cards!
Heather xxx

02/10/2010

Au Revoir....


When I started making this card I wasn't at all sure that a. I liked it or b.where I was going with it..but I persevered with it and I really like how it turned out. I used Paris Nights papers from g.c.d and teamed them with cafe au lait colours for matting & layering & embellishments. I used an X-Cut punch on the border and a shaped panel to hold the lovely fillagree Eiffel tower which was cut from brown glittercard and backed with a coffee coloured solid as was the 'Au Revoir' sentiment. I added dark brown ribbon and pinky-beige roses. A smattering of pearls complete the card.
Carts used:
Eiffel Tower-Summer In Paris Special Edition 2010
Au Revoir-Sentimentals
Shaped panel- Forever Young
Thanks for dropping by & have a great weekend!
Heather xxx

01/10/2010

Night Flight.....

Sorry I've been MIA, but Virgin have been playing silly beggars with my Broadband connection..God, you don't realise how much you depend (really???!!) on t'internet when you haven't got it!
Anyway, on to the card. I can only say that this photy doesn't do this card justice. It is actually dark blue and I think that the colour combo is MAGICAL! The white on blue is really stunning and with the addition of glitter it puts you in mind of snowy winter nights, the snow sparkling on the ground under the moonlight........
The papers are by Dovecraft from the Cuddly Christmas pack. Unusually I added gold cardstock to this (I know, it should have been silver, I don't know why I used gold!) but it works so hey ho!
I added a shaped panel to a square easel, and added a santa & sleigh cut from gold mirri. The moon was cut from white glittercard. A layered poinsetta and swirls cut from more glittercard adorn the bottom corner. ' Seasons Greetings' and a punched snowflake were adhered flat to the border which was edged with an MS Lattice Arch punch.
Carts used:
Santa & sleigh- Christmas Solutions
Moon- George
Seasons Greetings- Winter Woodland
Large snowflake on poinsetta-Christmas Solutions
Flourishes (underneath poinsetta)- Winter frolic
Thanks for looking!
Heather xxx

27/09/2010

Hope......


The good thing about these Easy Easels is that you can use scraps for them, and can also get 2 cards from 1 piece of double sided 12 x 12. I used 1/2 a sheet for this one, along with an MS punch, some organza Papermania ribbon and a layered bloom. The butterfly was cut from blue mirri embossed with a Swiss Dot embossing folder and pink glittercard, then enhanced with wire antennae and some blue pearls.'Hope' was cut from glittercard with a blue mirri shadow. Both the butterfly & 'Hope' were mounted onto scalloped ovals. A smattering of blue pearls complete the card
Carts used:
Butterfly- Sentimentals
Hope- Home Decor Solutions
Scalloped ovals- A Child's Year
Plain ovals- George
Thanks for dropping in!
Heather xxx

25/09/2010

Sleigh ride.....

At the moment I have enough cards to alternate between everday and Christmas cards, so it's a Christmas card for you today. Another Easy Easel (I'm afraid that you are going to be seeing a lot of these!) made with Dovecraft papers. I chose traditional colours for this one because the sleigh is quite classic and ornate. I used gold mirri to matt all the panels and for the base of the sleigh. The borders are decorated with an MS Holly punch. I cut the sleigh base once from gold mirri and again from patterned paper ( I cut off the runners) layered them up then added the gold mirri trim along the top. The sleigh was enhanced with a dressmaker's wheel and embellished with a layered poinsetta and punched leaves. The border beneath the sleigh was wrapped with red velvet ribbon and a bow added. The lower border was kept simple with a couple of flourishes and a simple sentiment.
Carts used:
Sleigh- Christmas Noel Solutions
Merry Christmas- Wild Card
Flourishes-Winter Frolics
Have a great weekend & thanks for dropping by!
Heather xxx