01/10/2009

Mr & Mrs


I've posted this card today especially for a lovely lady called Jenny who came to my workshop yesterday. She was visiting her niece Dee- who was also at the workshop-and she had come from Wales lugging her little bug with her & taking the opportunity to do some crafting whilst she was here. She liked this card and wanted to make one for some friends, I believe. So Jenny, this one's for you!!
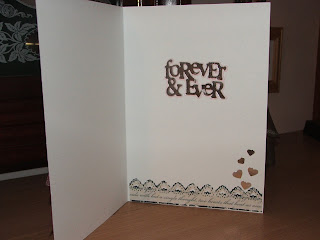
This card follows the same design as previous posts (I told you I was luvvin' this layout!) I used papers from a free CD from Papercraft Essentials and teamed them with pink & silver mirri cardstock. I cut 1 scalloped heart & 2 plain hearts (I cut the scallops off!) and added silver mirri Mr & Mrs. Sheer ribbon, layered flowers & pearls finish the card. I added some punched silver hearts, punched border strip & sentiment to the inside.
Carts used:
Scalloped heart- Lyrical Letters
Mr & Mrs- Sweethearts
Forever & ever- Stamping solutions
Thanks for looking & to Jenny I hope to see you again soon!
Heather

30/09/2009

So In Love


I hope I'm not boring you with the layout for my recently posted cards, but it is so easy to work with! I used exactly the same method as previous cards (it's amazing how quickly cards come together when using a layout that you like) but obviously just changed the image, sentiments & colours. The images on the Sweethearts cart all have layers to make multicoloured images, but I'm finding that I like the silhouette look (besides which, it's SO much easier than cutting out ALL of those darn layers!!!) I cuttlebugged the pink panel with a Fiskars texture plate and added the kissing couple cut from black glittercard then raised on foam pads. I added spotted sheer ribbon, layered flowers & punched glittercard hearts. The sentiment is a combination of glitter card & rub-ons. I decorated the inside of the card too.
Carts used:
Scalloped border- Accent Essentials
Kissing couple & 'Love'- Sweethearts
'Forever & ever'- Stamping Solutions
Thanks for dropping by!
Heather

29/09/2009

Glittery reindeer


Here's another card,this time Christmas themed,using the same layout as yesterday's card. I made it in exactly the same way but using Christmas papers. I only used one sheet of 12x12 double sided paper for this one as I liked the reverse side as much as the main design. I cut the reindeer from glittercard and added the harness which was cut from green card then glittered as I didn't have the right shade of green glittercard.I added a Prima glittered star (from a bubble bottle of Prima poinsettas) two flowers which I glittered, snowflakes, sheer ribbon & some punched stars.
Carts used:
Scalloped border- Accent Essentials (fit to length)
Reindeer (1 of 3)- Christmas Solutions
Merry Christmas- Calligraphy Collection
Thanks for looking!
Heather

28/09/2009

Totally you!


Is this the sweetest, girly image EVAH?!!! She's so retro! I love this layout too- I've made three cards today using it, I'll show you the others in time. I used freebie papers from Simply Cards & Papercraft OR Complete Cardmaking (not sure which). I was going to make a christmas card but looking closer at the papers I thought that they weren't particularly christmassy so I decided to make a girly card instead. I cut out the scalloped border and added it to a white polka dot embossed panel which was matted onto pink & green cardstock. I cut a rectangular panel from the 2nd paper and also matted it. The green panel was embossed with the Cutty and the image, cut from glitter card was added with foam pads. I added stripy green ribbon, a layered flower with paper rosebuds, punched hearts and the 'totally you' sentiment also cut from glitter card. I added a scalloped strip and sentiment to the inside of the card too.
Carts used:
Scalloped border- Accent Essentials (with 'fit to length' enabled)
Girl on scooter- Sweethearts
Totally you & Happy Birthday- Stamping Solutions
Thanks for looking!
Heather

26/09/2009

Joy To The World

This card was almost consigned to the bin! I 'borrowed' the layout which I liked, I loved the papers- but something just wasn't happening. I tried different shaped panels but nothing seemed right. So, out came the old Heidi rub-ons from Making Memories-et voila! Suddenly all was right with the world! I made that poinsetta from red & green handmade paper and I was quite pleased with it, I just added a smaller prima sheer flower to it. The paper is from Papermania & the ribbon is from the cheapo bin at The Range. I added a Papermania spotty Christmas brad to the centre of the poinsetta and a couple of red metallic brads to the white panel.
Carts used:
Joy- Wild Card
White shaped panel-StoryBook
Thanks for dropping by!
Heather

25/09/2009

Teddy Bear Birthday


Well, here it is! Is this the cutest bear or what!!!??? I was browsing a certain cart & saw this bear. It doesn't look much on the cart, so I cut one out of scrap paper and WOW! It's the most gorgeous little teddy! I cut the bear again from coloured card then chalked it around the edges and all the cut lines. I added the patterned pieces and then doodled again around the edges and all the cut the lines with a Tombow pen in a slightly darker colour (click the picture to see the detail) I added a bow to the neck & a shaped brad in the larger paw pad. I embossed a large white panel & matted it onto coloured card. I made another panel with a punched edge from coloured card & freebie papers. I added ribbon & a bow then adhered it to the card front with foam tape. I then added the bear. I cut a '1' from glitter card and adhered it with foam pads to the top right of the card. Titchy buttons & a flower complete the card. I put a simple sentiment inside using glitter card, plain card & patterned paper.
Carts used:
Teddy bear- Christmas Solutions (would you believe?!!!)
'1'- Base Camp (shadowed to give a chunkier number)
Today!- All Mixed Up
Hope you like the card & thanks for looking!
Heather

24/09/2009

Marry Me?


I can't tell you how chuffed I am at how this card turned out! I knew what I wanted it to look like but the end result is more than I could have hoped for. I tried cutting the ring box from Doodlebug velvet paper but Jiminy didn't like it and chewed it up & spat it out. What a mess!! So I cut the box from red card , cut the ring portion off it then glued & flocked it. I cut a blackout version in gold mirri (so that the gold would show through the cut- out in the box) and stuck them together. I added a mini heart brad to the side of the box. I cut the ring & sparkler from mirri & glitter card, decorated the ring with peel off borders then adhered it to the ring in the box. I embossed the large white panel with a Fiskars Texture plate & the Cuttlebug, matted it onto red & gold mirri then adhered it to the card front. I cut a strip of red mirri and puched out the edge with a Marta Stewart punch. I added a strip of Cuttlebugged gold mirri and red sheer heart printed ribbon with a layered flower. I cut the sentiments from red mirri shadowed with gold. The red hearts that I scattered over the card were waste from the border punching & also a small heart punch. I decorated the inside of the card with another punched border & hearts.
Carts used:
Ring box & sentiments- Sweethearts
'?'-All Mixed Up
Thanks for looking!
Heather
ps What I have for you tomorrow will make you go 'aaaahhhh!' in a 'how cute' kind of way!