31/03/2009

Under the weather?


When I saw this paper in the DCWV Spring Stack, I thought that it would be ideal for a get well card. It has clouds and giant raindrops on it and is in blue & grey- sky colours!
I covered the inside of the card with a houndstooth check in blue and covered the front with the cloud image paper. I freehand cut a cloud and added the word 'under' to it and then arranged the rest of the phrase below the cloud.. I cut an umbrella in two contrasting papers and silver mirri and then cut a grey shadow. I added a strip of paper across the bottom of the card which was trimmed with wavy scissors. I added some gunmetal flat backed pearls from Papermania, and on the umbrella, although you can't see them, there are some tiny raindrops- new adhesive flat -backed glittery drops from Papermania. The umbrella was raised on foam pads. I added glitter to the top of the umbrella and to the cloud and letters. I think that this card needs a strip of ribbon on the bottom where the gems are but never mind-I'll leave it as it is!
Carts used-
Under the weather- Don Juan
Umbrella- Marriage Solutions
Thanks for looking!
Heather

30/03/2009

Happy Anniversary Mum & Dad!


It was my Mum & Dad's 51st wedding anniversary yesterday and this is the card that I made for them. I love this colour combo of teal & chocolate. The papers were from the DCWV Spring Stack & Cathy Curd Collection from Papermania. I covered the front entirely with the DCWV paper and cut a strip from the Papermania paper which I edged with a Martha Stewart punch, and then added a ribbon & bow and some gems. I cut a frame and used it to frame a vintage postcard print that I bought eons ago (sorry, the flash has cut off the top part of the postcard!) I then added the sentiment and a layered flower with a lovely Laura Ashley fabric brad in the middle. I added a metal heart shaped charm to the bottom of the frame. As yet they haven't received the card (bloody Royal Mail!)and I posted it on Friday!!!! But hopefully they'll get it today and my Mum loves my cards and keeps all of them!
Carts used:
Frame- Wild Card
Happy Anniversary-Beyond Birthdays
Thanks for looking!
TTFN
Heather

29/03/2009

Just a note....


It was my Hubby's birthday on Friday and this is the card I made for him from me. I again used an assymetric card, this time cuttting the front much smaller than the back (about 5cms I think!) I covered the front with black paper & a smaller piece of glitter card from DCWV and the inside back was covered with a piece of vellum with musical notes all over it! Would you believe I've had this piece of vellum for yonks & have only just found a use for it & it went perfectly with this card!
I wanted a jazz musician for the front of the card so I downloaded an image from Google and reduced it on the photocopier. I then cut it out with a 1" margin all round. I added d/s tape to the white margin & stuck it to a piece of black card. I then cut out the image. I passed it through the Xyron & added black glitter to it (you can just see the sparkle in the photo) I stuck the glittered image onto a piece of silver mirri card and cut it into a rectangle. I added a contrast piece of patterned paper to the bottom of the mirri card piece and a strip of black ribbon with a music stave & notes on it. I added a treble clef wire embellishment to the ribbon. I then stuck the panel to the front of the card so that it overlapped onto the back. I added musical notes which were glittered with stickles and a sentiment panel adhered at an angle.
Hubby loved it!
Carts used:
Just a note:- Wild Card
Musical notes- Joys Of The Season (ten pipers piping)
The image was downloaded from Google images under 'jazz musician silhouettes'
Thanks for stopping by!
Heather

Because of You......


I used papers from the DCWV Glitter Spring stack for this card. The sentiment is suitable for many occasions but I'm going to put 'I am who I am' inside. It would make a nice Mother's Day card don't you think?
I added a super-duper sized flower to the centre panel and used a fabric covered brad in the centre of it. I coloured the bottom half of the sentiment with a dark yellow marker and then glittered just the darker part. I added three pink gems to the inside back of the card to finish.
Cart used:
Because of you- Wild Card
Hope you like it!
Heather

Be Happy!


This card was made with beautiful oriental-look paper from the DVWV Spring Stack. The front was cut narrower than the back and decorated with a punched strip of cardstock adhered to the inside front. A centre panel was pieced with contrasting papers and a punched border strip. A spotty voile ribbon & bow was added to the panel along with a sentiment medallion & layered flower with a blue gem brad as it's centre. The panel was raised on foam tape.

Carts used:

BeHappy- Wild Card

Scalloped circle- Story Book

Thanks for looking

Heather

25/03/2009

Sweet 16!


Here is a girly card made to the same recipe as the footy card a couple of posts ago! I used papers from the DCWV SWEET GLITTER STACK. Again I cut 3 squares adding them to the left hand side of the card. I added a centre panel of 'liquorice bomb' paper, matted & layered onto pink & spring green c/s. I added a ribbon,layered flower & gem brad. Sweet & 16 were cut, passed through the Xyron X & glittered (the sweet is hard to see but it IS there!) I added green gems around the top right hand corner of the large panel to finish.
Carts used:
Sweet & 16- Don Juan
Squares- George
Hope you like it!
Heather

24/03/2009

You're one of a kind!


Again I used the Spring Glitter Stack from DCWV- there are some seriously delicious papers in this stack!- and the same design of card as yesterday's. The inside of the card is the same paper as the top part of the front panel. I added a green voile ribbon, a layered flower with a bow beneath the cream flower,a large blue gem brad and 3 smaller gem brads. The sentiment was cut & the bottom half darkened with a Tombow blue pen and then the coloured half was glittered. The centre panel was raised with foam tape. Using strips of foam tape on the panel stops it sagging where there is no support.
Cart used:
Sentiment- Wild Card (RDS needs to be on when cutting these sentiments for your own cards otherwise they are cut in relation to the size of the card on the cart)
Thanks for stopping by!
Heather

23/03/2009

Bless U!


Here's another card made in the same way as yesterday's (if you're getting bored with these let me know!) I used the DCWV Glitter Spring stack and this time I added a frame. I tried to cut the frame from Doodlebug velvet cardstock but it made one heck of a mess of the cut, so I cut it again from red cardstock then passed it through the Xyron and flocked it with Papermania red flock. The finish is flawless and absolutely gorgeous! The 'blessU' was cut from green cardstock and the U was covered with glue and glittered. I added a red velvet bow and a layered flower with a gem brad at it's centre.
Cart used:
Frame & BlessU- Wild Card
Thanks for looking!
Heather

22/03/2009

All you need is LOVE


Here is another card made using the DCWV Spring Glitter Stack. I again cut the front of the card narrower than the back and covered them with two different papers. I added a green satin ribbon & bow, some pink crystals and punched green miniature hearts. The heart was cut from spotty paper & green velvet paper from Doodlebug as was the sentiment on the heart & the card front. I added a panel of white card to the inside of the card for a sentiment to be added.
Carts used:
Heart- Doodlecharms
Sentiment on card front-Don Juan
Love (on heart)-Beyond Birthdays
Thank you for stopping by!
Heather

20/03/2009

Score!!!!!


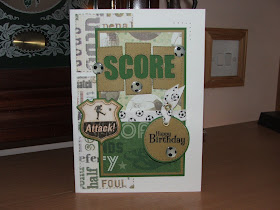
Here's another footy card for you,but it could be easily adapted to suit other contact sports. I used 3 different football themed papers & cut the same 3 panels and centre panel as yesterday's card. I added some football printed twill ribbon, a tag and an embellishment from K & Co (I think!)The little footballs on the 'score' panel & tag were made by putting dome stickers over the footballs on some patterned paper and then cutting them out by hand. The sentiment on the tag is by Papermania. I attached the tag to the ribbon by passing the ribbon on the tag under the other ribbon & fastening with an eyelet ( a bit more 'manly' than a bow!) I added some paper pricking around the top right hand corner of the panel to finish.
Carts used:
SCORE-Graphically Speaking
Circle tag & shadow- George
Thanks for taking a look!
Heather

19/03/2009

Happy Birthday Kate!


It's my niece Kate's birthday today & you've guessed it-she's 17! I made this card in the same way as the 'you did it!' card from yesterday with the same three panels on the left and the large centre panel. I used paper from DCWV All Dressed Up stack, and Bazzill Bling for Kate's name. I added printed ribbon from QVC, a velvet flower layered with a black dotty Prima and a black faceted brad from Papermania. I added black gems around the top right hand corner for added emphasis.
Carts used:
Kate- Calligraphy Collection
17- Don Juan (the seven has a stroke across it which I cut off)
Hope you like it!
TTFN
Heather

18/03/2009

You did it!

I was given these papers to make a card for a demo day,and I made this one with left overs! The papers are Glitz and are particularly suitable for male cards. I cut 3 squares and adhered them down the left hand side of the card. I then cut a panel for the front and covered it with 2 designs of paper, then matted it onto red & black cardstock. I added a ribbon, 3 eyelets, a car key and a car. The key was cut 3 times in silver,black & red then cut & pieced together and threaded onto the ribbon. The car was cut from wrapping paper stuck onto a piece of card and cut out. I then cut a suitable sentiment and adhered it to the panel. The panel was then adhered to the front with foam tape. To finish off I added some pricking around the right hand corner of the panel.
Carts used:
Square panels-George
You did It!- Don Juan (there are little starbursts on this but I cut them off!)
Car Key- Going Places
Thanks for stopping by
See you tomorrow!
Heather

17/03/2009

Forty & Fabulous!

I didn't know where I was going with this card when I started it! I had just bought the DCWV Spring Glitter Stack (boy!these papers are FAB!)I literally just made it up as I went along! I made adjustments here & there with placement of the elements until I was satisfied and this is the end result. I used 3 different papers from the stack(they are all double-sided so you can make one card from one 12x12 sheet,with scraps from other pieces).Again I cut away 2 cms from the front & scalloped it (I do this after covering the front with paper) and added a contrast paper to the inside back. On this piece I also added a rectangle of white card for the addition of a sentiment. I then cut a panel for the front and scalloped the bottom. I added a small strip at the top with a ribbon trim & the word 'fab' which was 'fabulous' trimmed down. Fab was cut from Doodlebug velvet cardstock. I then added a 40 & @ again cut from contrasting papers. I punched out a circle for the '@' to sit on. A layered flower completed the card.
Carts used:
Fabulous (cut down)-Wild Card
@- Wild Card
40-Don Juan (any font cart will do!)
Thanks for looking
Back tomorrow!
Heather

16/03/2009

Happy Mother's Day, MUM


Well, Mother's Day will be here on Sunday and so these are the cards that I made for my Mum .
I haven't decided yet which of the Mum cards I will give her- it's a tough one 'cos I love 'em both! The Mum cards have had 2 centimetres cut from the right hand side of the front, covered with patterned paper, then the cut edge was trimmed with Fiskars Cloud scissors. The inside back of the card was covered in a contrasting pattern (sorry, you can't see from the photo). I cut a panel for the front & covered it with more patterned paper, trimmed it with a ribbon & flower, Laura Ashley fabric brads (in the centre of the flowers) and three brads at the bottom of the panel. I then cut out the sentiments- Mum & Happy Mother's Day,glittered them & stuck them into place. The panel is raised with foam tape ( much easier to use when fixing large panels!)
The Nan card was made with a panel of patterend paper adhered to a piece of pink card with a scalloped edge. I added a smaller strip of paptterned paper, a ribbon & flower and a scalloped frame which holds the sentiment. I rounded the top right corner of the panel,which was adhered to the card with foam tape again. I added some pricking for added emphasis. I have to apologise in advance,but you will see a lot of cards like these over the next few days!
Carts Used:
MUM- Stamped
Happy Mother's Day- Calligraphy Collection
Scalloped frame- Wild Card
NAN- StoryBook
Hope you like them!
Thanks for looking.
Heather

Sorry!

Sorry for the lack of blogging yesterday folks! I have had an uber-busy weekend & just couldn't find the time to photograph & upload my cards for this week. I will try to do them later & get them up by late today or tomorrow morning at the latest. See ya later!
Heather

08/03/2009

Born to dance


This card shows that Christmas carts can be used for other occasions too! Joys Of The Season has some great icons on it including this little dancer. I cut her from flesh coloured card and her dress from pink card. I cut the dress twice and layered it up. I added a pearl head-dress, pearl earring and pearls around her waist. I used a glue pen to draw swirls on the bodice and create ruffles on the dress and then threw glitter on it. I used paper from a K & Co 12 x 12 pad and added a punched paper border. I added a satin ribbon and a flower layered with a bow. I cut out a pair of ballet shoes from the paper and place them beneath the centre of the bow, and added 3 pearls to the ribbon. I cut out the words 'born to DANCE and adhered them to the right hand panel- DANCE is on foam pads and glittered. I think this card would be great for a little girl who loves ballet or for an older girl taking a dancing exam.
Carts used:
Dancer- Joys Of The Season
DANCE- StoryBook
born to- Calligraphy
Thanks for looking!
Heather

Dino-mite day!


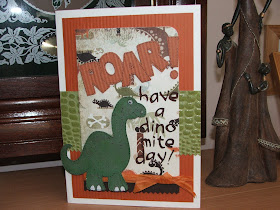
This cute little fella is on the Paper Doll cart and I thought he'd be perfect for a little boy's card. I had this cute Dino paper and this little fella would look grrrrrreat with it! I had to flip him to get him to face the way I wanted and then I chalked him (which doesn't show up on the photo!) to add definition. I added a doodle black line around the edge and along the cut lines defining the legs & tail. I used a white gel pen on his feet & gave him a googly eye! I corrugated a piece of brown card with a Fiskars Texture plate as I haven't got a Cuttlebug, and added some great skin textured paper that I got in a pack from The Works. I cut out the word ROAR and the rest of the sentiment. ROAR was doodled in the same way as Dino. The exclamation mark was cut seperately by hand. I added a raffia bow (again from The Works)which I hope isn't too girly! I rounded the top right hand corner of the printed panel & layered it all up. I glittered Dino with Opal Dust which is a fab liquid containing teeny tiny sequins and specks of glitter. You can just about see it in the photo!
Carts used:
Dino- Paper Doll
ROAR- Animal Kingdom
sentiment-Zooballoo
Hope you like him!
Heather

Little Stars


Whilst browsing the many fabbo card making blogs out there I came across a card with this sentiment on it. My card is very similar to the original but I've added a few more embellies and changed the shape of the panel that holds the sentiment. I used paper from Nana's Nursery for each of the cards. I cut out the stars and heart, passed them through the Xyron and then sprinkled them with glitter. I fixed the heart to the star with a teeny button brad. I added a scalloped oval with white Bazzil swiss dot plain oval which holds the sentiment, a satin ribbon & bow embellished with a flower & fabric rose. Three gems along the ribbon finish it off.
Carts used:
Scalloped Oval & 'STAR'- StoryBook
Plain oval, star & heart- George
'a is born'- Zooballoo
Thanks for looking!
Heather

01/03/2009

A New Home?


I got this paper yesterday- it's the Daisy & Dandelion A5 paper collection from Design Objectives and it's very pretty & only £2.99 for 30 SHEETS! How's that for value?!!! I cut a house out of spotty brown paper, layered it over polka dot pink paper and added a frill round the eaves of the roof. I added glittered pink hearts to the roof & the door. I adhered a piece of paper with scalloped edge to the bottom part of the card after wrapping a piece of polka dot ribbon around it. I added a bow & layered flower. I then stuck the house onto the card and added tiny pink glittered hearts above the chimney. The sentiment was cut from patterned paper, The HOME was cut in card first and the paper letters stuck onto it. This was then added with foam pads to add dimension. Three Papermania adhesive pearls were added to finish it off.
Cart used:
House & sentiment- Don Juan
Thanks for stopping by!
Heather
Hope you like it

The patter of tiny feet!

I've wanted to make a card from scartch JUST using a standard cartridge for ages just to see how it turned out really- and this was the end result. I'm chuffed with it! It turned out better than I hoped!
I cut out the base card with the little feet on it & then cut out a pair of feet to embellish it with. It was trial and error getting the feet to match the ones on the card but I got there eventually! The card has a lovely scalloped edging on it. I added a 3cm strip on patterned paper to this edge and then trimmed away the excess paper. I punched a hole in each scallop. I cut a frame to go around the aperture and backed the aperture with the same patterned paper. I ran the feet through a Xyron X & covered them in Glamour Dust to make them sparkle. I cut out the sentiment- He's/she's here! and added it along with a bow layered up with a flower. Three little star gems from Papermania finished it off! This card could be used for a birth announcement or just as a general new baby card. The measurements for the card are: Card 7" , feet 3 3/4"
Carts used:
Card base: New Arrival (card2)
feet- New Arrival
sentiment- All mixed up (shadow on)
Frame around aperture- George & Basic Shapes with silhouette on
Thanks for looking!
Heather

For you MUM


With Mother's Day coming up soon here's a simple card that will suit the occasion! It's simple- just three papers cut in different widths, layered up and embellished with satin ribbon, a large layered flower and three buttons with brads inserted into the holes. The MUM was glittered.
Cart used:
For you & MUM- Calligraphy
The layout is based on a sketch I saw blog-hopping but I cannot remeber who's blog it was! If you recognise it please contact me & I will credit you. Thanks!
Heather

Get Well


I've had this paper lying around for yonks! There was only a little left-just enough for one more card! I layered up the papers (I think that they are Basic Grey) raising the panel with the sentiment on with foam pads. I added a printed satin ribbon bow, layered flowers and some Papermania adhesive pearls. I then cut out the sentiment and adhered it flat to the raised panel. I then glittered the sentiment & flowers to finish.
Cart used:
sentiment- Calligraphy
Hope you like it!
Heather

Happy Easter!

I don't send Easter cards but I love this little bunny & take any opportunity I can to use him!
I cut the litle bunny, chalked some rosy cheeks and added googly eyes.I also hand cut some ear inners(?!) I layered up some old Easter papers from DCWV Spring stack from last year. I added a scalloped border in yellow Bazzill and put the bunny on a plaque of the same colour with a small piece of contrasting paper. I cut some easter eggs from another backing paper, ran them printed side down through a Xyron X and then added Glamour dust to make them sparkle. A bow layered with a flower & spotty brad were added for extra decoration. I cut out the sentiment, shadowing the EASTER and glittered them with glitter glue after adhering them to the card. The ribbon under the flower is from the Range and is printed with little Easter eggs. Very cute!!
Carts used:
Bunny- Doodlecharms
Happy Easter- Don Juan
Thanks for looking!
Heather
Toot! Toot!


Here's a little cutie for ya! Just right for a little boy who loves cars! I simply layered up some patterned paper, added ribbon with little cars & 'zoom!' on it and a couple of contrasting big brads. I cut out a cute little car (it reminds me of Noddy's car!) 4 times in Black ,silver, red & aqua , then chopped & layered them up. I added Toot Toot & Birthday boy for the sentiment and green brads for the wheel centres.
Carts used:
Car- Paper Doll Dress Up (with flip feature on)
Toot Toot & Birthday- ZooBalloo (alphabet)
Boy- Graphically Speaking
Hope you like it!
Heather

Play Hard!


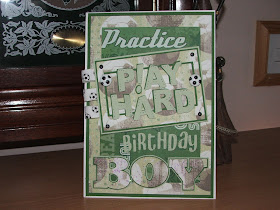
Here's one for all of you who find male cards hard. There are some great icons on the Graphically Speaking cart that are suitable for the men in our lives! Although I've turned this into a footy card it could also be relevant for Rugger, Cricket......... I've just used some old & new footy papers and added a couple of football buttons and some great football twill ribbon- not too much 'cos it is for a fella after all!
Carts used:
Play Hard plaque- Graphically Speaking
Birthday & BOY- Don Juan ( Boy with 'under pressure' feature on)
I hand cut the second shadow on the 'BOY'
Thanks for looking!
Heather